Introduction
Using Stable Diffusion to create personalized AI art is possible; However, it takes a little bit of work. The simplest way is to use another system called Dreambooth. This is part 2 of 3 so I strongly suggest that if you don’t have Stable Diffusion running locally to look at part 1.
1. Installing Stable-Diffusion WebUI locally
Getting Stable Diffusion running locally on your machine so you have complete control over all the elements, also access to a wealth of extensions and options.
2. Training Personalized Models with Dreambooth
In this post, you will probably need to rent a server for a GPU powerful enough to train your personalized model ($0.50 per hour), although if you have a powerful machine locally you might avoid the need.
3. The Future Applications and Pitfalls
This third part of the series will chart the potential future of the systems, the copyright issues and the backlash that is sure to only grow in the art community.
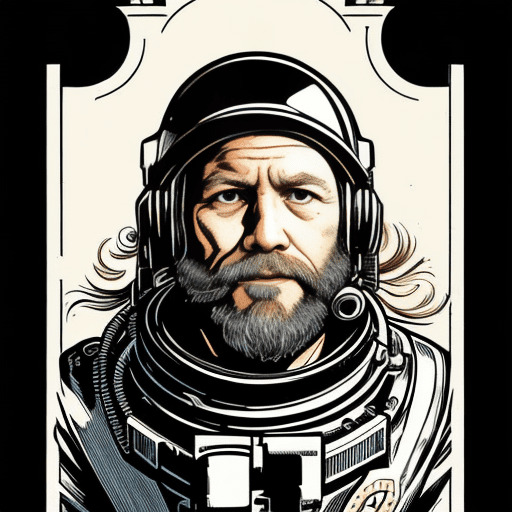
“Comic book style of james person science fiction astronaut, on a spaceship, steam punk, cogs, victorian tech, DC, A medium portrait of an (epic) historical scene, (realistic proportions),intricate, elegant, painted by Posuka Demizu, Yoji Shinkawa“
Caveats
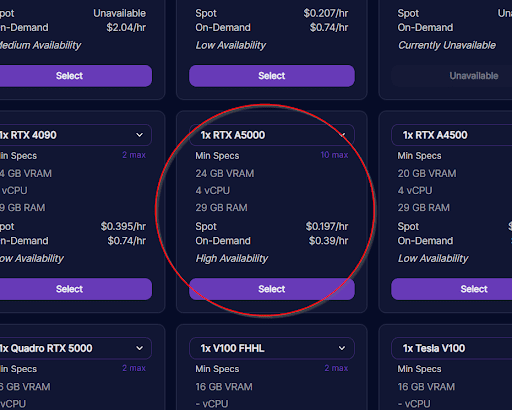
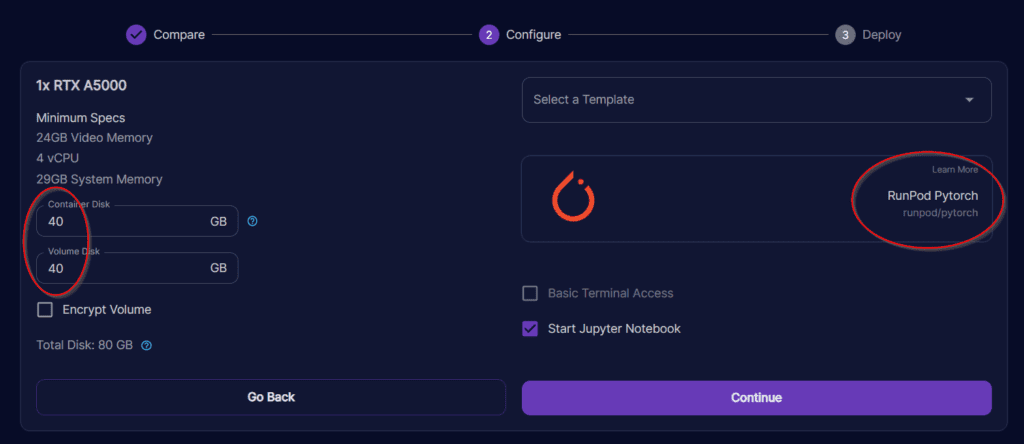
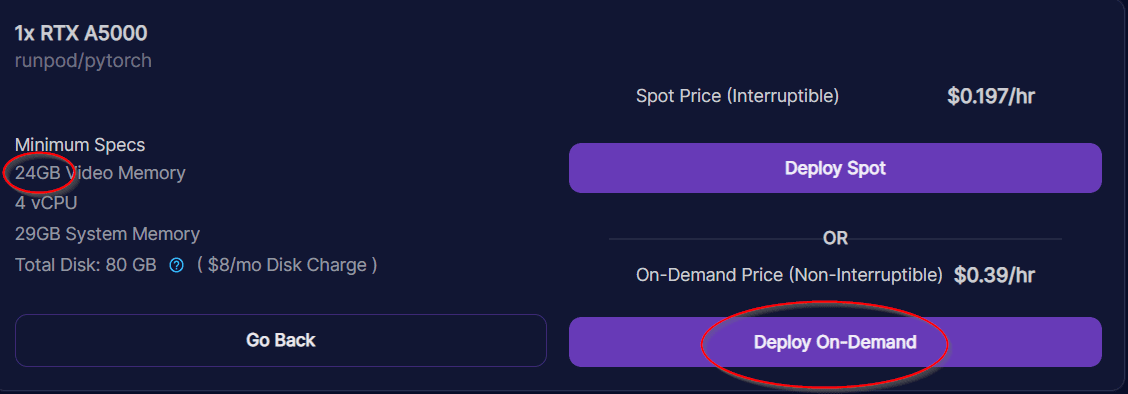
While Stable-Diffusion will be running locally on your machine, we will be using a paid-for server online to run Dreambooth. The reason for this is the need for a very high-power GPU to run the training model, This algorithm requires a GPU with a minimum of 24GB of VRAM. While the EVGA GeForce RTX 3090 FTW3 is a great option, if you can get your hands on one, the price for a new one at time of writing is in excess of $1,500 USD.
Secondly, a lot of this tutorial has been tested mostly on windows with an NVIDIA-based GPU, although there are links to pages that explain the process for Macs/Linux and AMD-based GPU machines.
Download list of all AWS Services PDF
Download our free PDF list of all AWS services. In this list, you will get all of the AWS services in a PDF file that contains descriptions and links on how to get started.
What Is A Personalized Model?
By default you can prompt for some famous people and their likeness will appear in the image generated. Worth noting that due to legal reasons this list of celebrity his been greatly reduced in version 2.1 see post 3/3 of this series for more info.
So if you give the prompt:
“model of james person as a bobblehead figurine , toy box, 3D render, blender, good lighting, advert”
The Stable Diffusion model has no idea who “James” is.

For reference that is me above.
Below are the prompt results from the standard model and the Personal Trained Model
Standard Model
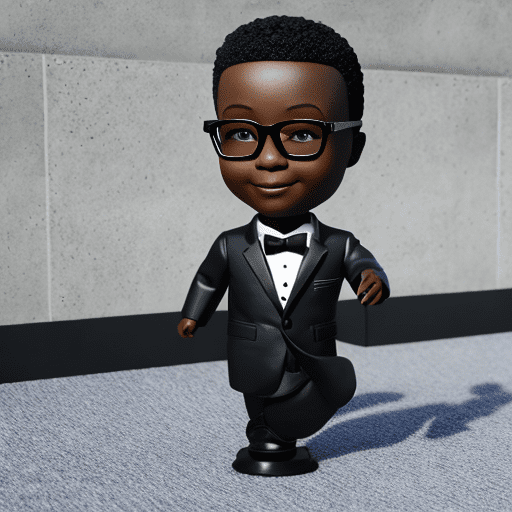
Definitely Not me
Personal Trained Model
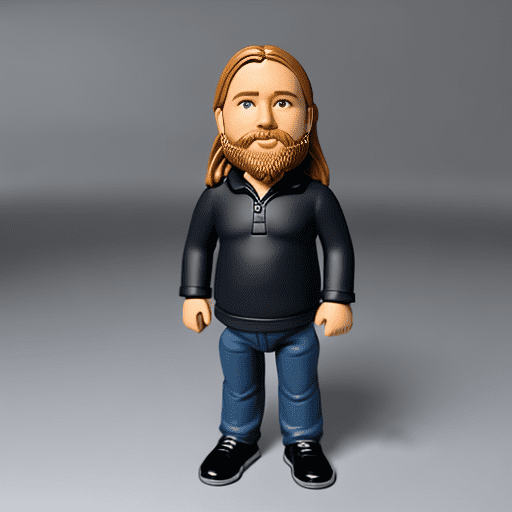
Kind of me, thanks Stable-Diffusion for keeping the paunch…
Training A Model
Stable diffusion WebUI is not 100% necessary; you can run everything from the command line; however, the local web version running on your browser makes the process 1000 times easier.
What does this tutorial cover?
Training, checkpoints, source material
As mentioned before some things you should be aware of going in.
As I already said, you’ll probably need to rent a pay-on-demand server to run the training algorithms (unless you have a beast of a machine locally), this is pretty inexpensive and I’ll take you through the steps.
Adjust your expectations of results; I’ve shown a few good images here, but the quality of the training images, the configuration of the training you use and even the way you prompt the interface can all combine to make things that go from “oh that’s me”, to “oh that looks a bit like me in a weird kind of way”, to “what is this monstrosity, why does it have no face!!”.
Step 1 - Assemble Your Training Images
With Dreambooth, we can take a small number of images around (20-30) to train our model. However, the types of images we use do matter. Also, for various reasons, you must use an even number of images in your training.
The Recommended Ratio of Image Types Are As Follows:
- Full body: 15%
- Upper body: 25%
- Close-up on Face: 60%
| No° of photos: | 20 | 30 | 40 | 50 |
| Full body: | 3 | 5 | 6 | 8 |
| Upper body: | 5 | 8 | 10 | 13 |
| Close-up on Face: | 12 | 17 | 24 | 29 |
Training Image Set
“Take photos to train on with your final images in mind, the ML will use the images in the set to find your features, if you’re always wearing glasses or a hat, then the model will assume that is part of you.“
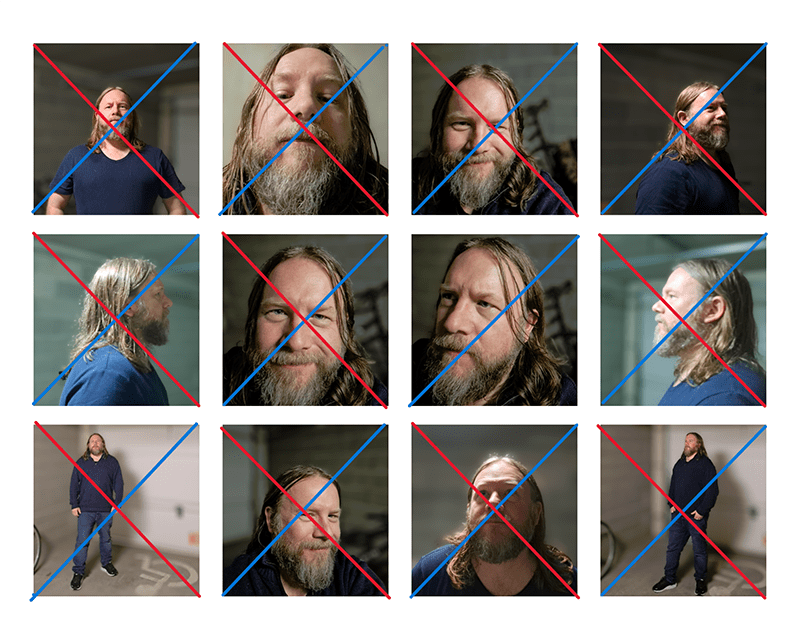
Training Images Must all be of exact dimensions (512×512)
Once you have your images all taken, you then need to make sure they are all the same dimensions (note: Stable-Diffusion v2.0 and v2.1 both allow a higher dimension 768×768).
Thankfully there is a free website that can help here BIRME.net will let you upload and resize any images in seconds
It will also allow you to select part of a larger image to make sure you have the face/body shot you want.
For more advanced users, you can use Adobe Bridge to do the same thing locally, potentially with better-resizing resolution changes.
Training images must all be PNGs
In the same way, the website https://jpg2png.com will allow you to convert all your resized images into png for free.
Summary
By now, you should have a folder on your computer that contains an even number of images in the ratios shown in the table above. Now we need to move on to the next step of training with them!
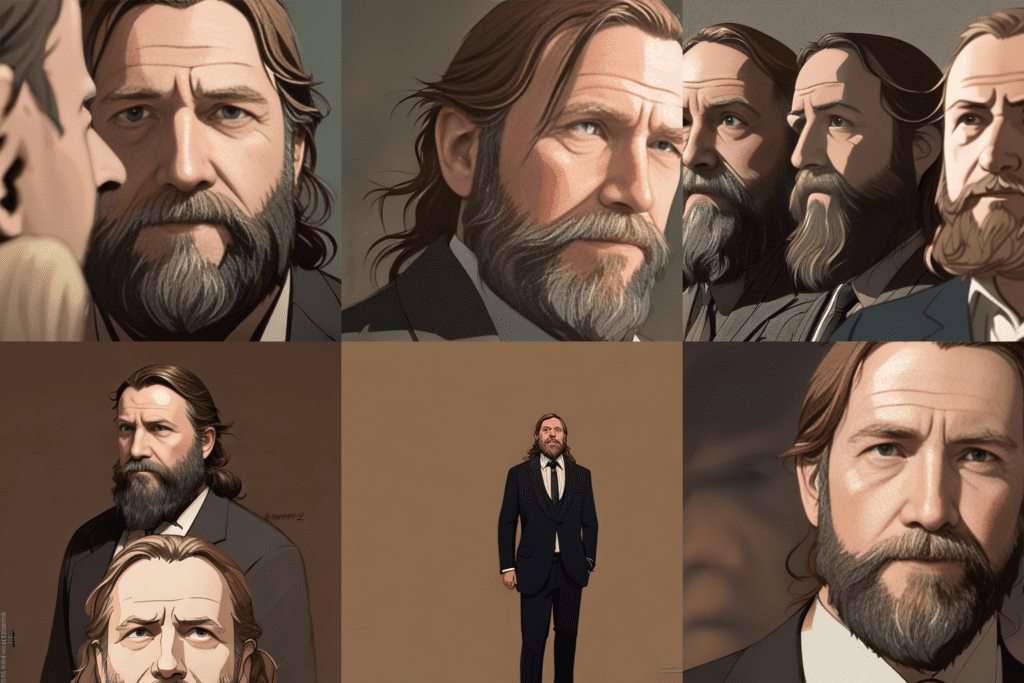
“A close shot movie still of james person in a suit, digital painting, artstation, concept art, smooth, sharp focus, illustration, art by Krenz Cushart and Artem Demura and Alphonse Mucha, A medium portrait of an (epic) historical scene.”
Training Images Must all be of exact dimensions (512×512)
Once you have your images all taken, you then need to make sure they are all the same dimensions (note: Stable-Diffusion v2.0 and v2.1 both allow a higher dimension 768×768).
Thankfully there is a free website that can help here BIRME.net will let you upload and resize any images in seconds
It will also allow you to select part of a larger image to make sure you have the face/body shot you want.
For more advanced users, you can use Adobe Bridge to do the same thing locally, potentially with better-resizing resolution changes.
Training images must all be PNGs
In the same way, the website https://jpg2png.com will allow you to convert all your resized images into png for free.
Summary
By now, you should have a folder on your computer that contains an even number of images in the ratios shown in the table above. Now we need to move on to the next step of training with them!
Step 2 - Setup Dreambooth
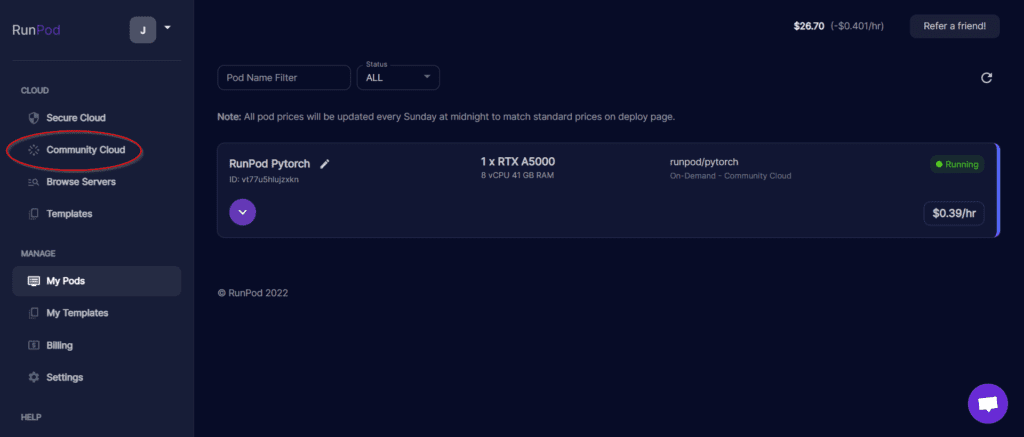
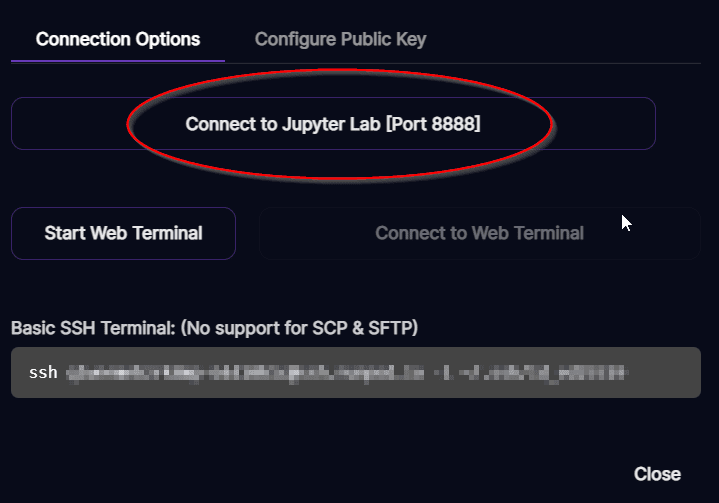
The system we’ll use is RunPod, as there is an existing GitHub project with excellent (and simple to follow instructions by JoePenna) which is built to run on RunPod’s Jupyter python system. This will make things much easier and shouldn’t require any technical knowledge*. The final cost for the server I used was $0.44/hr which is not bank-breaking.
*It shouldn’t require much technical know-how, but there are constant updates in this field and there is the possibility of things breaking, way beyond the scope of this blog. The best thing to do is to visit JoePenna’s GitHub issue pages if you experience a problem.”

Install the Dreambooth Onto The Pod
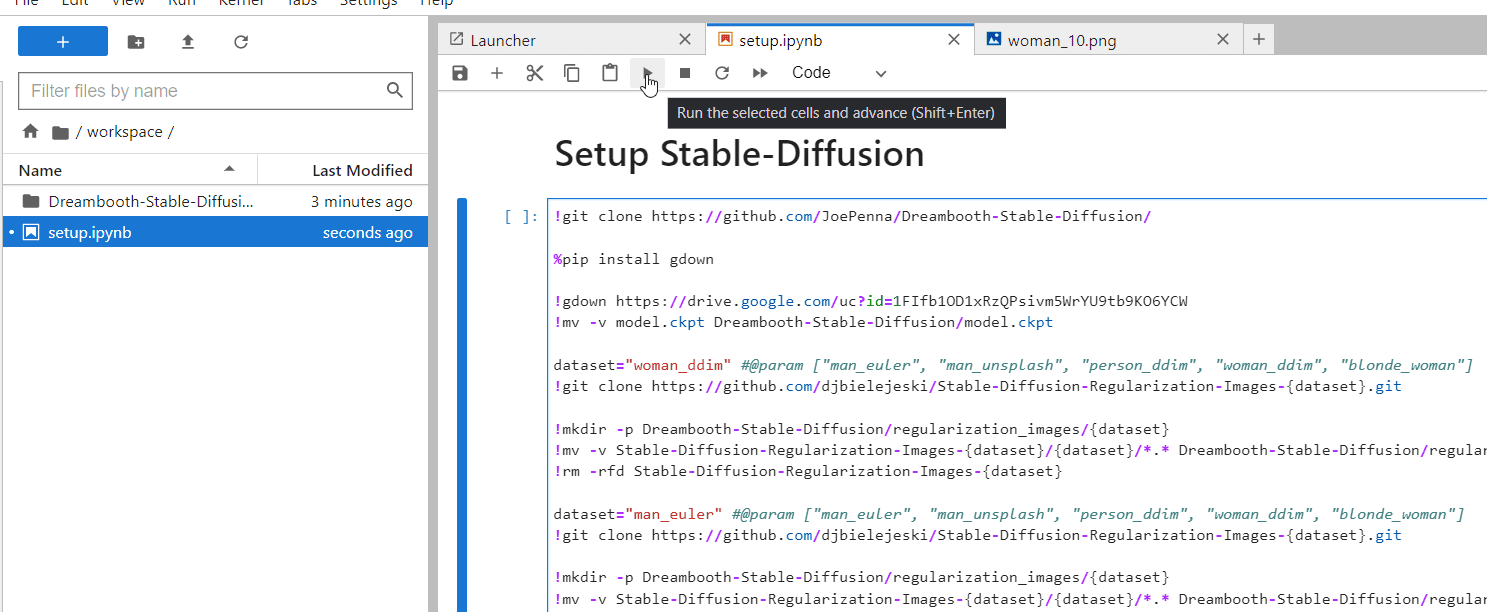
Download our quick start script to set up Dreambooth, download the Stable-Diffusion model and add a few regularization image sets automatically.
- Download our script here. Allcode_setup.ipynb
- Upload that to the Jupyter folder /workspace/
- Double-click to open the file.
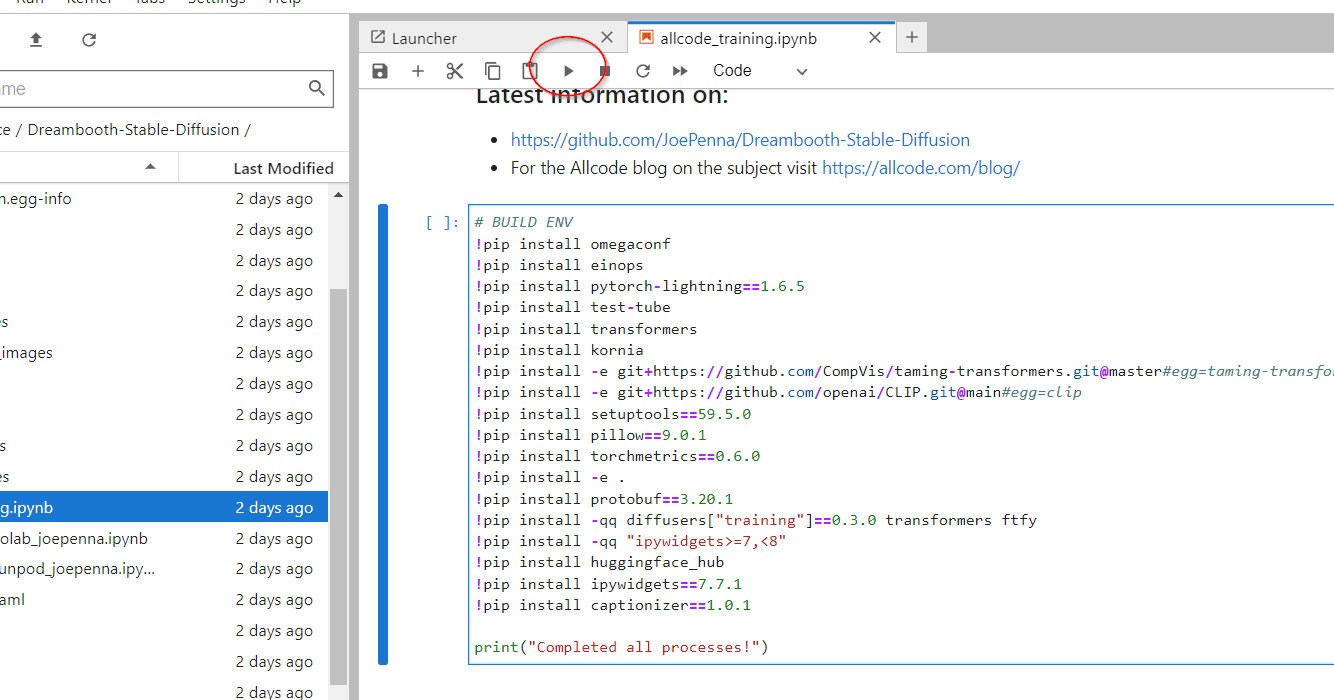
- Then click on the code shown on the right, and click the run (play) button
Step 3 - Setup the Environment
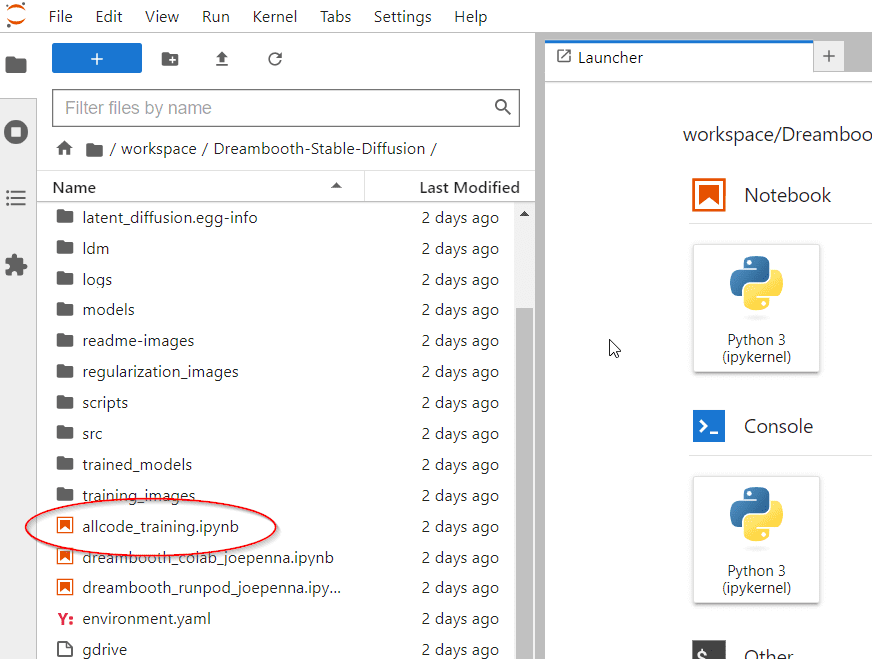
If you click on the workspace/Dreambooth-Stable-Diffusion/ folder and then open the allcode_training.ipynb file there will be a similar setup showing prompts to setup the environment and then training
NOTE: For whatever reason, we have found that each time you restart the pod, you need to rerun this script, it only takes moments though. Sometimes we had to run the same script twice (?).
Step 4 - Upload the Training images
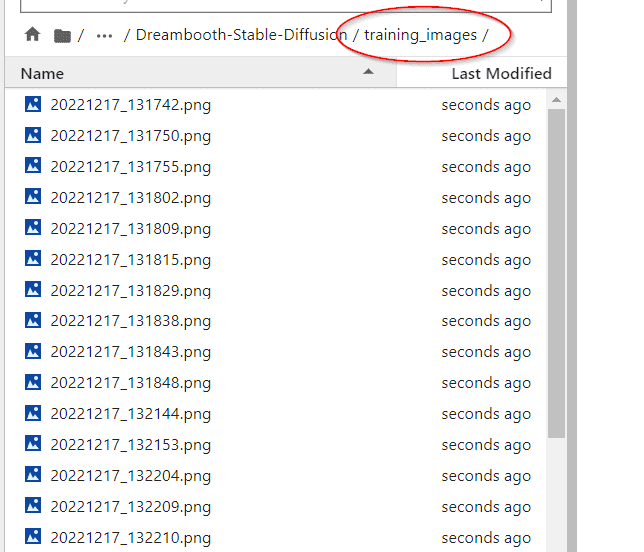
Take the training images we created in the previous steps and upload them into the /training_images/ folder. You can do this just by dragging and dropping the files into the left-hand area of the webpage or you can right-click and click upload.
Step 5 - Start the training process
Now the training images are in place we need to set a few parameters in the second area of the script.
- dataset: as part of our initial Allcode setup we installed the man_euler, person_ddim, and woman_ddim datasets. These are meant to be reference images, although we have never really noticed any problems with the default “person” set.
- project_name: This has no effect on the training it’s just a reference for you to know which project/test you’re running
- max_training_steps: This, as it states, is the maximum number of training sets, you should set this to the number of training images x 101. so if you have 20 images edit this to 2020
- class_word: This is part of the prompt you are going to use when you want to personalise an image locally, again like the dataset above, you can leave it as “person”.
- token: This is the unique token that will identify your personal model when doing a prompt. It could be your name ‘james’ or whatever you want it to be.
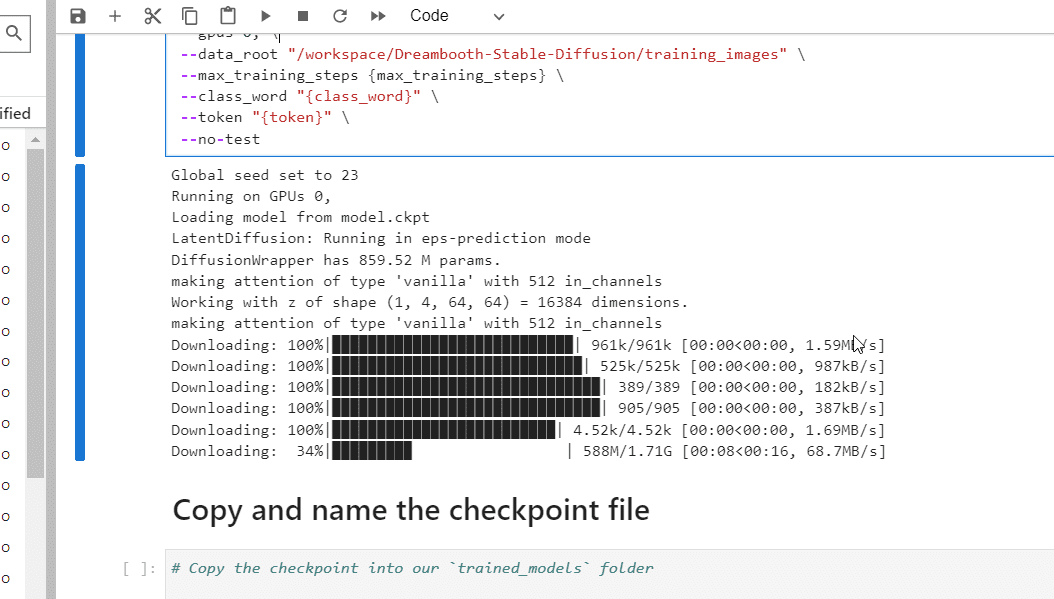
Now you have set those parameters just hit the run (play) button to start the training process.
Eventually, after a lot of text and code scrolling by you should see a timer saying how long the process is going to take. Leave the browser open and go and make a coffee / do other things while the model is trained.
Step 6 - Download Your Personalized Model
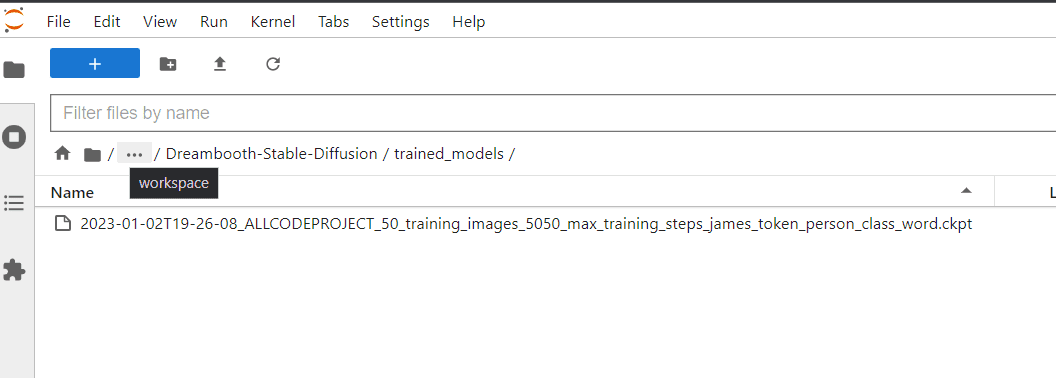
When the training has been completed you’ll be left with a model in the /training_models/ directory. For the example above you’ll see something like the following:
Right-Click on the CKPT file and download it, (it will be around 2 Gb, so expect to wait for awhile.
Step 7 - Install Your Personalized Model Into The WebUI
When you have downloaded the CKPT file to your computer we suggest renaming it. Keeping the token and class_word to help you remember what you need in the prompt to use your personalized token. So for example:
2023-01-02T19-26-08_ALLCODEPROJECT_50_training_images_5050_max_training_steps_james_token_person_class_word.ckpt
Becomes james_person.ckpt
Which makes it just a little bit easier to read.
- Copy and Paste the CKPT file to your Stable-Diffusion WebUI folder
- Based on our previous tutorial this will be at
- D:\AI\stable-diffusion-webui\models\Stable-diffusion\
- Then start the Stable-Diffusion WebUI with the bat/sh script.
- Open the WebUI at http://127.0.0.1:7860/
Step 8 - Use Your New Personalized Model in WebUI
In the Stable Diffusion WebUI interface at the top right, there is a drop-down menu which will now show the new model that you created.
Remember your Token and Class_Word
When you trained the model in our case
- class_word: person
- token: james
You will need to include the words james person into the prompt to return your personalized trained images if you write just james or just person. You won’t see your face appear.
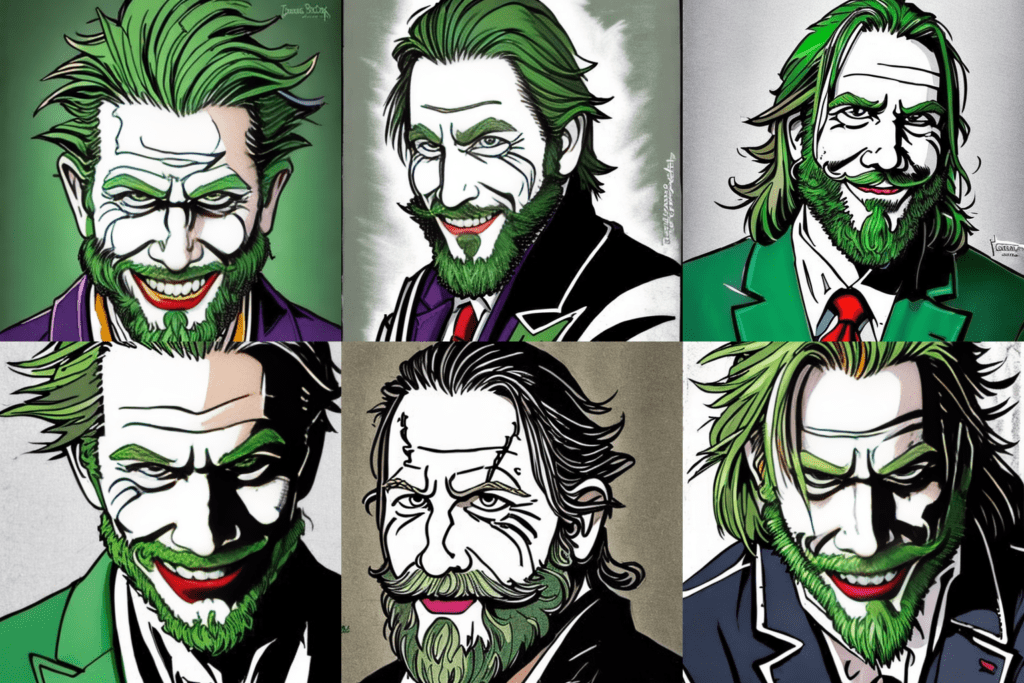
“A comic version of (james person :1.2) as the joker, beard, comic art, Anime, comic style”
If you want to increase the importance of a word or phrase select the word then use Ctrl+Arrow-Keys to increase or decrease its importance in the prompt.
Finishing Points
This tutorial was still all about Stable Diffusion 1.4 and recently things have changed with the newer version of 2. We’ll cover more about the evolution of Stable Diffusion tech and AI art in the 3rd article.
For negative prompts we have found the following:
“lowres, text, error, cropped, worst quality, low quality, jpeg artifacts, ugly, duplicate, morbid, mutilated, out of frame, extra fingers, mutated hands, poorly drawn hands, poorly drawn face, mutation, deformed, blurry, dehydrated, bad anatomy, bad proportions, extra limbs, cloned face, disfigured, gross proportions, malformed limbs, missing arms, missing legs, extra arms, extra legs, fused fingers, too many fingers, long neck”
For ideas for prompts, we suggest looking at the following
Useful Websites
- Lexia.art https://lexica.art/
- Openart prompt guide (pdf) https://openart.ai/promptbook
Limitations and tips
Depending on how many images and how many training batches you used (there are advanced options beyond this tutorial). You may find that faces look distorted, odd artefacts appear (particularly at a distance), and eyes and hands in particular have various issues.
Make sure you check the “Restore Faces” option!
Play with the position of the prompts the earlier in the prompt the more impact it will have if you find that your images look just like photos of you lower their importance or move your prompt further from the start.
Seed this is part of the random generation of the images, if you get a set of images you like don’t forget to save the seed number which can be found underneath the generated images.
If you want to recreate/remember prompts from a previous session you can open the PNGInfo tab and then select any image you created previously. This has all the settings that were used to create it embedded.

“A close shot movie still of james person in a suit, digital painting, artstation, concept art, smooth, sharp focus, illustration, art by Krenz Cushart and Artem Demura and Alphonse Mucha, A medium portrait of an (epic) historical scene.”





0 Comments