
In this tutorial, we’re going to deploy the Ethereum Truffle Pet Shop DApp demo to an AWS EC2 Micro instance.
If you’ve played with Ethereum’s Solidity programming language to deploy smart contracts to the blockchain, you’ve come to the realization that Ethereum and Solidity are desperately in need of a development framework. Truffle is the best development framework for Ethereum that we’ve encountered.
Truffle comes with a demo app, Pet Shop, which is similar to the old J2EE demo app. I’m not going to rewrite the Truffle Pet Shop tutorial, which you can find here. Instead, I’ve already implemented the Truffle Pet Shop locally on my Mac OS X. The goal of this tutorial is to get this demo app to run on an AWS EC2 instance on my own test network. I’ve checked in the completed Truffle Pet Shop tutorial into Github, http://github.com/joel-maws/truffle-pet-shop. Let’s get started!
For this tutorial, you will need to have the following items:
- AWS Account. If you don’t have one, you can sign up here.
- EC2 micro instance. This can be procuredf from your AWS account.
- You’ll need to be able to ssh into the EC2 micro instance.
- You’ll need to install Node.js > 6.0.0 to the micro instance. I installed Node.js 6.11.2. You can install Node.js by following these steps as specified by Amazon.
Next, you’re going to install TestRPC and Truffle. TestRPC is the test environment that makes it much easier to run your own testnet. We have another blog posts that describes how to create a CustomGenesis.json block for testing here. For this tutorial, save yourself the trouble. Use TestRPC.
After you ssh into the micro instance, type the first command below, which will install TestRPC. Next, type the second command, which will install the Truffle development framework into your current directory.
-
npm install -g ethereumjs-testrpc -
npm install -g truffle
Next, we’re going to pull the completed Pet Shop demo from my Github repo by typing the first command into the ssh terminal. We’ll then run npm update in the same terminal to update our node_modules.
-
git clone http://github.com/joel-maws/truffle-pet-shop.git -
npm update
After the npm update is performed, go into the node_modules directory to ensure that the modules are populated.
Now, we need to start up the TestRPC Ethereum server. In order to do this, you’ll want to open another command shell, ssh into the EC2 instance, and run TestRPC. When you run TestRPC, you’ll want to make note of the available accounts, private keys, and mnemonics.
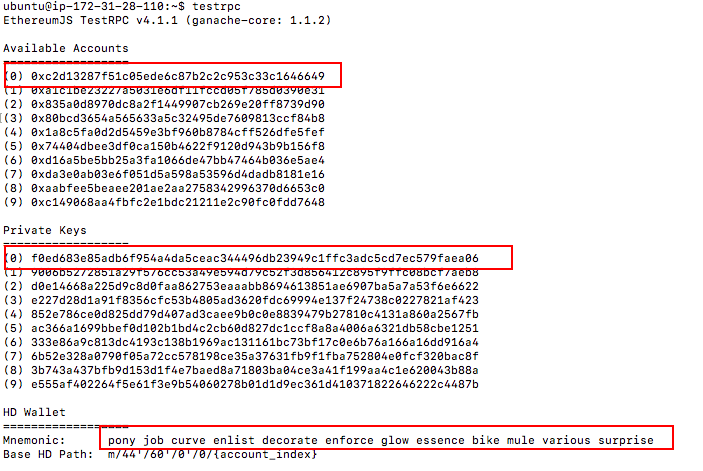
Ethereum TestRPC Output
After you’ve started TestRPC, it should be listening on port 8545. Next, go back to your initial ssh terminal. If you’re cheap like me and you’re running this on an EC2 micro instance, then you’ll want to increase your swap space. Otherwise, your TestRPC instance will run out of RAM during compilation of the source code. You’ll want to create a 1 GB swap file. In the initial ssh terminal, type the following commands to create a permanent swap file:
sudo /bin/dd if=/dev/zero of=/var/swap.1 bs=1M count=1024
sudo /sbin/mkswap /var/swap.1
sudo chmod 600 /var/swap.1
sudo /sbin/swapon /var/swap.1
To enable the swap file by default after reboot, add this line to/etc/fstab
swap /var/swap.1 swap defaults 0 0
Next, return to the directory where you performed the git clone. When we pulled down the source code from Github, we didn’t build the binaries. Solidity is a compiled language that runs on the Ethereum Virtual Machine (EVM), so we’ll want to compile the source code into bytecode so we can deploy the bytecode to the blockchain. Type the following command into the ssh terminal to compile the contracts:
truffle compileYou should see the following:
ubuntu@ip-172-31-28-110:~/truffle-pet-shop$ truffle compile
Compiling ./contracts/Adoption.sol...
Compiling ./contracts/Migrations.sol...
Writing artifacts to ./build/contracts
Now that we’ve successfully compiled our contracts, it’s time to migrate them to the blockchain. Truffle comes with a migration deployment framework which is very similar to Ruby on Rails schema migration.
You’ll run the following command shell in the terminal:
truffle migrateYou should see the following output:
ubuntu@ip-172-31-28-110:~/truffle-pet-shop$ truffle migrate
Using network 'development'.
Running migration: 1_initial_migration.js
  Deploying Migrations...
  ... 0x9ec8c0d6d406d916bd586e9ffdbe7734268bd56c4e5d584095e8835421fe3eae
  Migrations: 0xdfe7aba2130ae5b4f1dbcca1271500624908770f
Saving successful migration to network...
  ... 0xd760961f69ff0b635a27881607da4a8377605bb32a438d5f284f490006d952ea
Saving artifacts...
Running migration: 2_deploy_contracts.js
  Deploying Adoption...
  ... 0x0d59a5b2b006b1ed904f8e5a953dedee4782c02bf5c0fe2d38fbc00acc7b13a6
  Adoption: 0x60a992a4be13df50000c2945ac84bb42316a40ad
Saving successful migration to network...
  ... 0xf2376f5e0ca4517b2c1fd56a01f1cd1aa3fddc254f05ea94599812386014db18
Saving artifacts...
In your other terminal shell that is running TestRPC, you should see output that resembles the following:
Listening on localhost:8545
net_version
eth_accounts
eth_accounts
net_version
net_version
eth_sendTransaction
  Transaction: 0x9ec8c0d6d406d916bd586e9ffdbe7734268bd56c4e5d584095e8835421fe3eae
  Contract created: 0xdfe7aba2130ae5b4f1dbcca1271500624908770f
  Gas usage: 201556
  Block Number: 1
  Block Time: Thu Aug 24 2017 05:17:13 GMT+0000 (UTC)
eth_newBlockFilter
eth_getFilterChanges
eth_getTransactionReceipt
eth_getCode
eth_uninstallFilter
Our contracts now reside on the TestRPC blockchain. We’re most of the way there.
Now, we need to host the web app. For this tutorial, we’ll use the lite-server as it’s a lightweight web server that comes with the Truffle PetShop app. The invocation of the lite-server is specified in the package.json of the demo.
We’ll run the following command to run the lite server.
npm run devThe dev command in package.json will start up the lite-server. For me, the web server will run on port 3001 and the admin console will run on port 3002. You can modify the port by specifying the port in the bs-config.json
You’ll most likely need to update your iptables to redirect traffic from 80 to 3001.
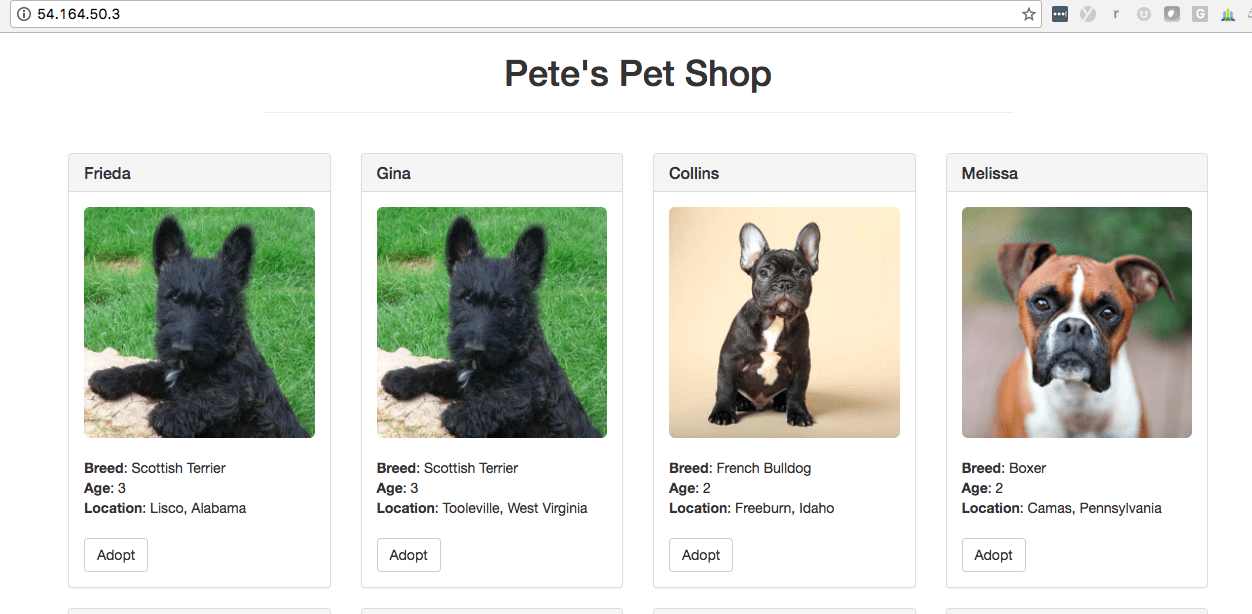
sudo iptables -t nat -A PREROUTING -p tcp --dport 80 -j REDIRECT --to-port 3001Now, navigate to your AWS EC2 micro instance external ip. Voila, your web server should be up and running.
In our next tutorial, we’ll start to run through the kinks of the deployment. We’ll also look into MetaMask and running this on Geth instead of TestRPC.
Note: We are interested in joining the Toptal Software Consultants Group.