In this six step guide, we will go over the process of how to migrate your DNS from Godaddy to AWS Route53.
Step 1- Log In
To start the migration process, you need to log into the Amazon Web Services console and select ‘Route 53’. Route 53 can be found in the Networking and Content Delivery section. The next step in the process is to create a hosted zone to act as your domain manager for your domain. In order to create this hosted zone, you should select the Create Hosted Zone button.
Step 2
In this step, we will access the GoDaddy management console by clicking on the ‘DNS’ button. Once inside the console, locate the ‘Change’ button and follow the prompts to rename the servers. It is important to note that the current GoDaddy DNS block typically contains two name servers, which are commonly listed as “NS#.domaincontrol.com” for easy identification.
To integrate AWS DNS servers into your GoDaddy DNS manager, simply copy and paste the names of the AWS DNS servers into the appropriate section. After completing this step, save the changes by clicking the ‘Save’ button and refresh the display. Upon refreshing, you will notice the NameServers section, where the AWS DNS servers will now be pointing to the corresponding servers.
Step 3
For this step, you will enter your domain name in to the ‘Domain Name’ field and select the ‘Type’ option to ‘Public Hosted Zone’. Select ‘Create’ once all required fields are filled out. After creation, you will be routed to a screen displaying an NS record as well as an SOA record. For each of these fields, select the record, set the TTL to an appropriate value, make any additional adjustments to the records (not typically required), and finally click the ‘Save Record Set’ button.
Step 4
The next step will be to log into the GoDaddy console. After logging in, select the Domains option and select the DNS you are migrating from GoDaddy to AWS Route 53. After selecting the domain, click the DNS option. Selecting this option will retrieve a list of DNS records for the selected domain.
For a New Domain
In the event that you are using a brand new domain, you don’t have to select existing DNS records as there won’t be any DNS records available.
For an Established Domain
Established domain names will likely be required to create a list of existing recores which can be manually add the records onto the hosted zone for AWS Route 53.
Step 5
The next step will take you to the ‘Nameservers’ section of the page. In the ‘Nameservers’ section you will see a list of the DNS servers that the selected domain is currently configured to use. In order to proceed, you must rename the servers to match the name of the servers that Route 53 is configured to use. To retrieve teh names of these servers, go back to the Route 53 console and select the ‘Hosted Zones’ tab. After selecting the ‘Hosted Zones’ tab, select the radio button associated with your domain name. There will be a tab on the right, which will display the names of the NameServers being used.
Step 6
From here you will need to access the GoDaddy management console. In the console, click the ‘Change’ button and follow the prompts to rename the servers. Paste the names of the AWS DNS servers into GoDaddy’s DNS manager.
Click the ‘Save’ button and refresh the display. After refreshing you will see the NameServers section, with AWS DNS servers pointing to the corresponding servers.
Migration of a WordPress Website from Godaddy to AWS Lightsail
Your content goes here. Edit or remove this text inline or in the module Content settings. You can also style every aspect of this content in the module Design settings and even apply custom CSS to this text in the module Advanced settings.
Step 1
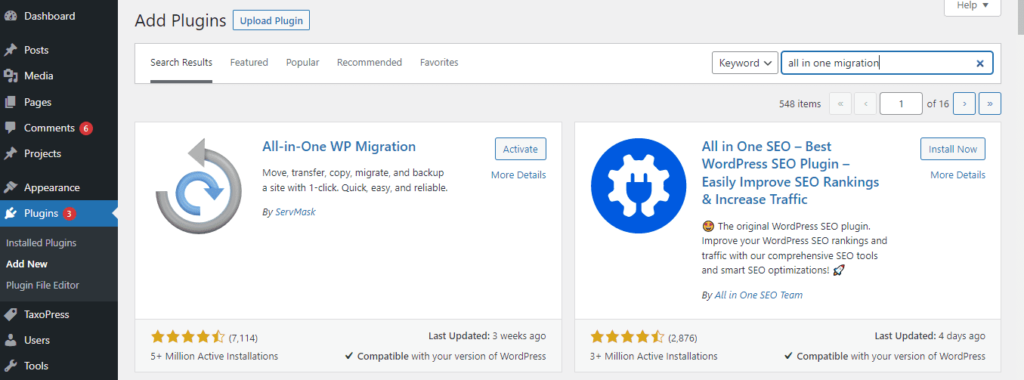
To begin the process of migrating your WordPress website from Godaddy to Amazon Lightsail, log in to the WordPress dasboard as an admin. After logging in, you will install WordPress’s “all-in-One WP Migration” plugin.

Step 2
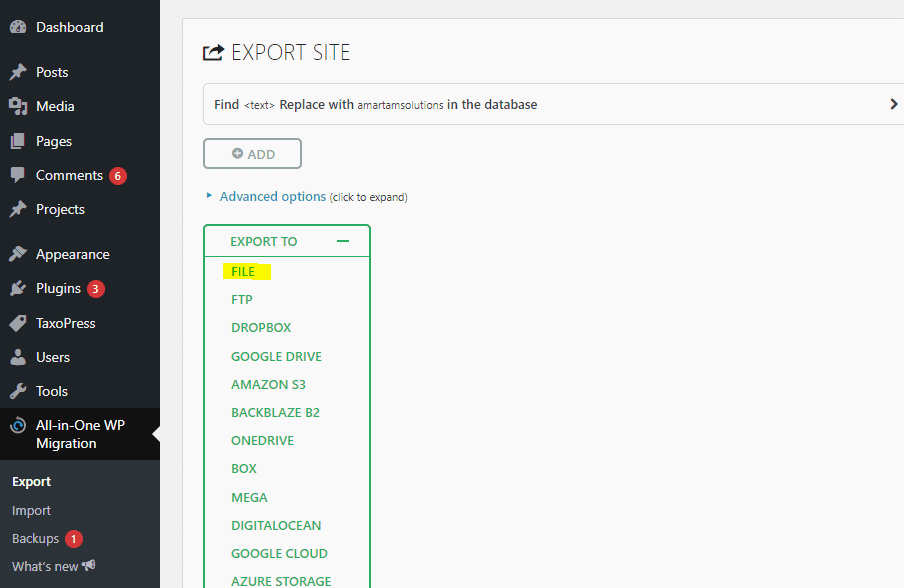
Now that the All-in-One WP Migration plugin has been installed, active the plugin by selecting Export. Once Export has been slected, you will select the ‘FILE’ option in the ‘export to drop-down’ box.

Step 3
Log in to your AWS account, or create an AWS account if you do not have one.
Step 4
Click on ‘Connect using SSH’ and enter the command below. This will get you the WordPress admin password.
Step 5
After enterring the above command, you will go to X.X.X.X/admin in the browser, where X.X.X.X is the static IP.
Step 6
Enter the user and password details when the login prompt shows up.
Step 7
Install any available updates.
Step 8
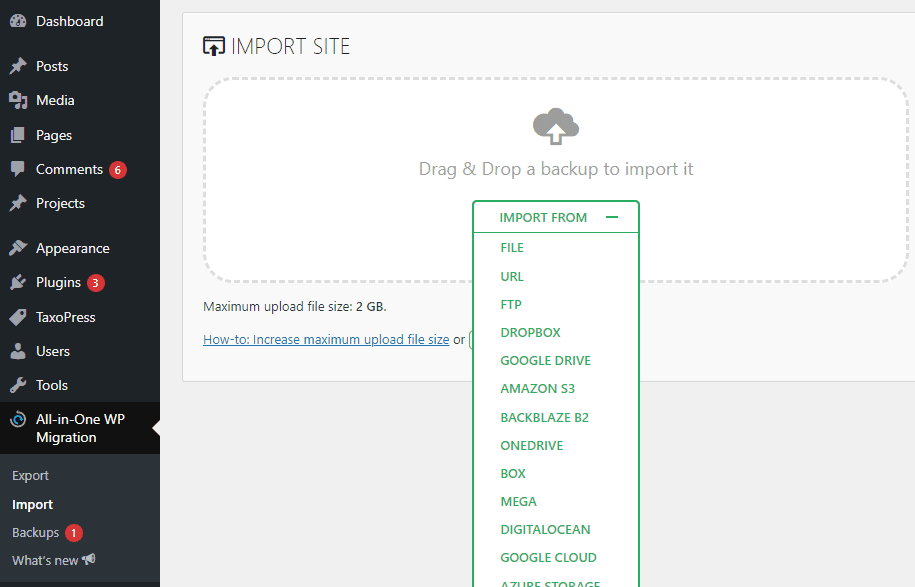
Access the ‘All-in-One WP Migration’ plugin and choose ‘FILE’ and select Next.

Step 9
Replace the admin user with the previously used admin user.
Step 10
After the import has completed, log out and back in, to correct the admin user.
