
If you HODL, staking Ethereum is a great way to generate rewards from your Ethereum bankroll. This blog post will walk you through the steps to withdraw rewards from Ethereum staking by setting up a withdrawal address so that your validator node will deposit Ethereum into your wallet every 6 days.
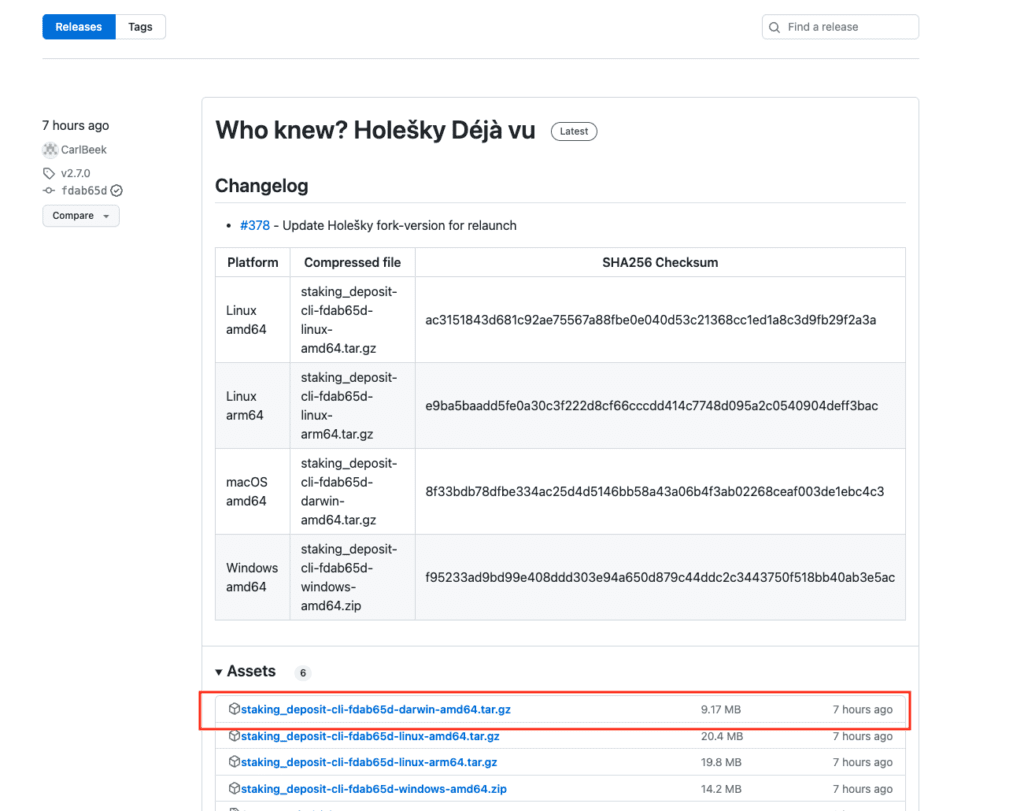
First, let’s start by setting up your withdrawal credentials. Navigate to https://github.com/ethereum/staking-deposit-cli/releases to download the official staking deposit Command Line Interface (CLI). I’m on a Mac so I’ll download the darwin-amd64.tar.gz highlighted in red below.
After you download the file, move the file to the appropriate location. I like to create a folder to manage my validators.
Open a terminal shell to the location, and run the following command to open up the tarball and unzip the contents in the correct directory structure
tar -zxvf staking_deposit-cli-fdab65d-darwin-amd64.tar.gz -C staking_deposit
Next, in your open terminal shell, create a new file entitled set_withdrawal_address.sh with the following command
vi set_withdrawal_address.sh
Paste the following command into the vi editor,
./deposit --language=english generate-bls-to-execution-change \
--chain=mainnet \
--mnemonic="<Your Mnemonic>"
--bls_withdrawal_credentials_list="<OLD BLS WITHDRAWAL CREDENTIALS STARTING with 0x00>"
--validator_start_index=<The Key Start Index in EIP-2334. If you have one validator, the value is 0>\
--validator_indices="<The Validator Index as specified in BeaconChain>" \
--execution_address="<Your Withdrawal address>"
Now the items in bold, you’re going to have to replace with the values of your beacon node and the wallet that created the validator node.
Your Mnemonic - The Mnemonic is the seed phrase for the wallet you used to launch the validator node. Keep these phrases private. Don’t check them into Github. After you finish this process, you will want to remove the set_withdrawal_address.sh. Otherwise, your seed phrase will be sitting on your hard drive.
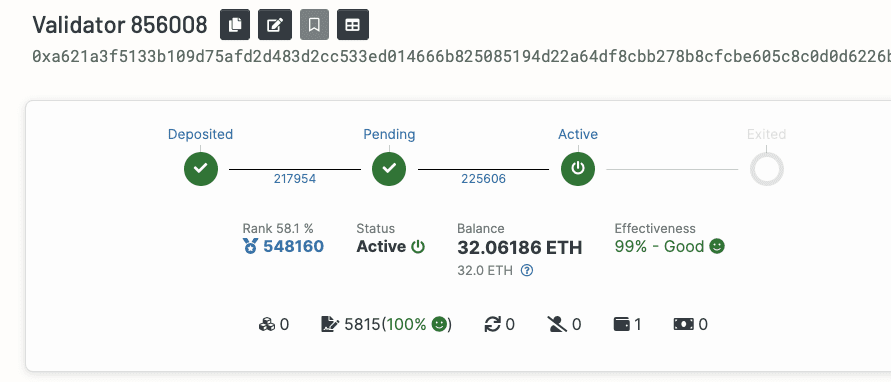
OLD BLS WITHDRAWAL CREDENTIALS STARTING with 0x00 - This is the wallet address that is currently specified on your validator node. You can acquire this by navigating to your validator node. In my case, the validator node on BeaconChain is https://beaconcha.in/validator/0xa621a3f5133b109d75afd2d483d2cc533ed014666b825085194d22a64df8cbb278b8cfcbe605c8c0d0d6226b27686155
Copy the validator index number highlighted in red below.

Next, navigate to https://launchpad.ethereum.org/en/withdrawals
Paste the validator index number into the form, hit the VERIFY ON MAINNET button, and copy the Withdrawal credentials.
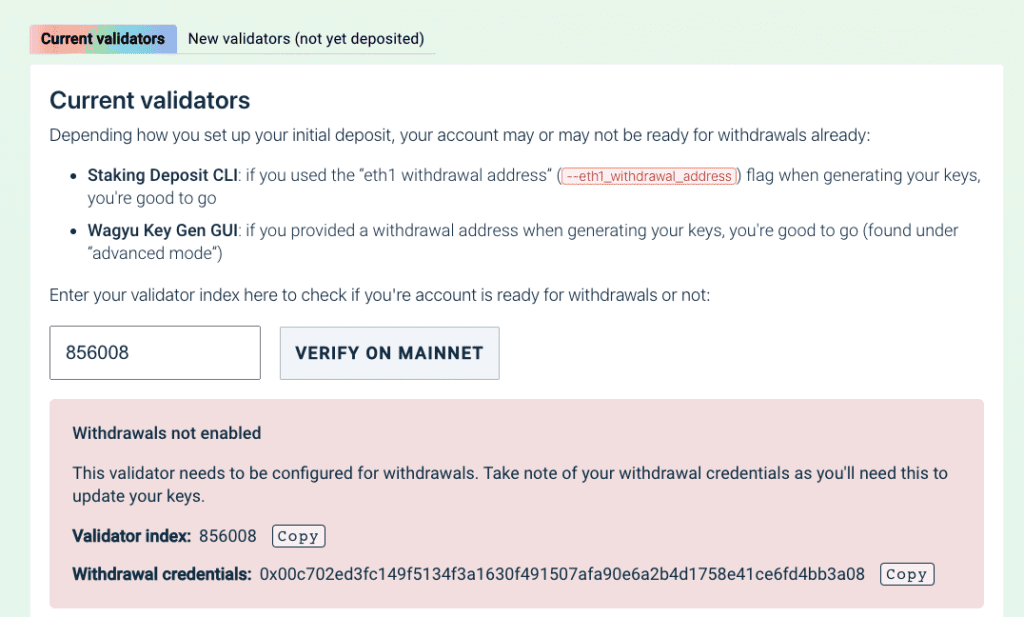
Whew, we’re done with grabbing the old validator credentials. This value will always start with 0x00. If you see a 0x01, then your withdrawal address has already been set!
The Key Start Index in EIP-2334. If you have one validator, the value is 0 - In most cases, this value will be 0. The exception is if you have multiple validator nodes. If you have multiple validator nodes assigned to the same wallet, then this is just an array index starting at 0. If you have 2 validators, then the value will be 1. If you have 3 validators, then the value will be 2.
The Validator Index as specified in BeaconChain - This is the validator index number that you acquired when you acquired the Withdrawal credentials. In my scenario, the value is 856008.
Your Withdrawal address - This is the public key of the Ethereum wallet where you want your rewards deposited.
After you update all of these values in vi, you should save by pressing Esc to enter Command mode, and then type :wq to write and quit the file.
Your shell script should look like the following:
./deposit –language=english generate-bls-to-execution-change \
–chain=mainnet \
–mnemonic=”one two three four five six seven eight nine ten one two three four five six seven eight nine ten one two three four” \
–bls_withdrawal_credentials_list=”0x00c702ed3fc149f5134f3a1630f491507afa90e6a2b4d1758e41ce6fd4bb3a08″ \
–validator_start_index=0 \
–validator_indices=”856008″ \
–execution_address=”0xYYYYc33eC6aC7EF1ZZZZZZ01905ec58B144BWWWW”
Now to run the file, in the terminal shell, type
chmod +x set_withdrawal_address.sh
Next, run the file by typing the following into your terminal shell,
./set_withdrawal_address.sh
When you run the command, you should receive the following output:
% ./set_withdrawal_address.sh

***Using the tool on an offline and secure device is highly recommended to keep your mnemonic safe.***

**[Warning] you are setting an Eth1 address as your withdrawal address. Please ensure that you have control over this address.**

Repeat your execution address for confirmation.:
Enter your wallet address again to confirm. You’ll now see
**[Warning] you are setting an Eth1 address as your withdrawal address. Please ensure that you have control over this address.**

Verifying your BLSToExecutionChange file: [####################################] 1/1

Success!
Your SignedBLSToExecutionChange JSON file can be found at: /Users/BudBud/Documents/github/staking_deposit/staking_deposit-cli-d7b5304-darwin-amd64/bls_to_execution_changes

Press any key.
We’re not quite done yet.
Next, we have to post the output SignedBLSToExecutionChange JSON file to the Ethereum universe.
You have a couple of options when it comes to broadcasting your wallet address out to the world. Either you can run a command line CURL command from your terminal shell, or you can navigate to a browser to drag and drop your JSON file. I prefer the browser option because, at this point the in process, I’m invariably done with cutting and pasting values, so I almost always opt for the browser option. With that being said, here is the command line option first.
Navigate back to your terminal shell, and copy and paste the following command:
 curl -X POST -H “Content-type: application/json” -d @<@FILENAME DESTINATION> \

http://<BEACON_NODE_HTTP_API_URL>/eth/v1/beacon/pool/bls_to_execution_changes
With this command, you need to specify the <@FILENAME DESTINATION> and the <BEACON_NODE_HTTP_API_URL>.
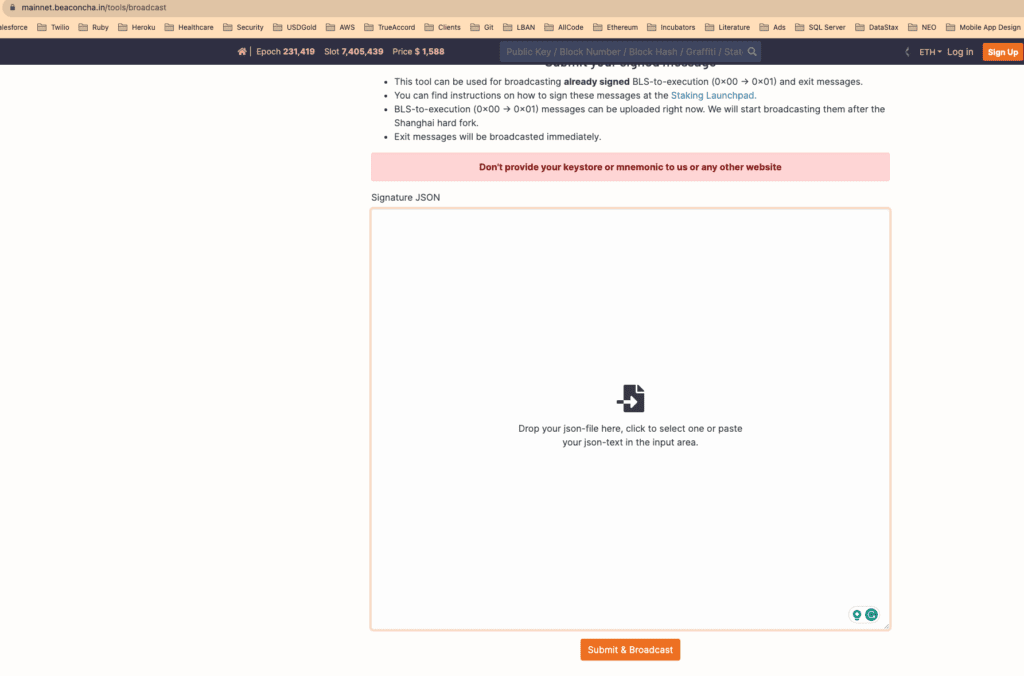
The browser option, which is much easier at this point, requires you to navigate to https://mainnet.beaconcha.in/tools/broadcast, drag and drop the output file bls_to_execution_change-16959yyyy.json into the drop zone, and click the Submit & Broadcast button
When you click Submit & Broadcast, you’ll then receive the following results:
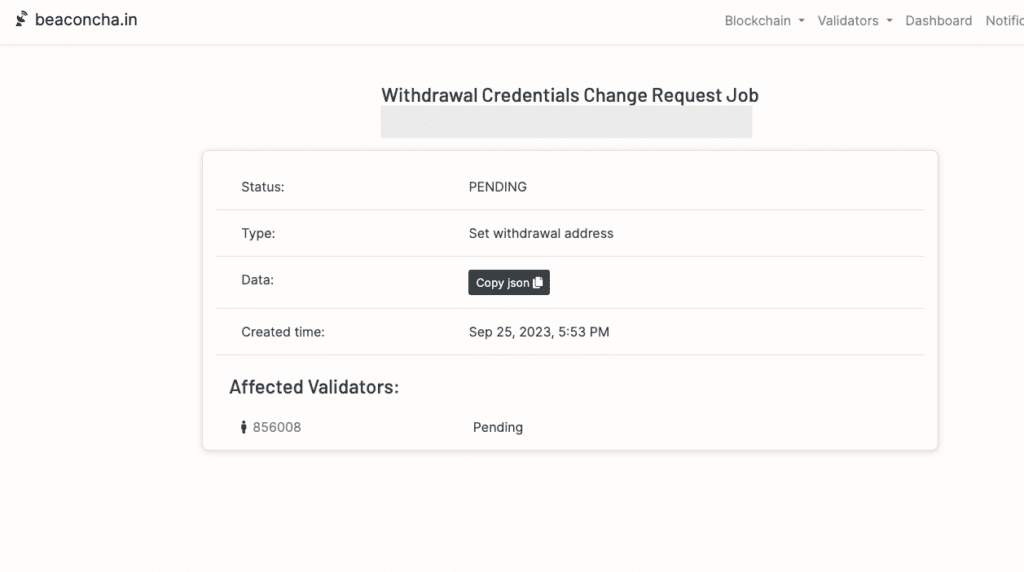
When you navigate to your validator on BeaconChain, you’ll see that a withdrawal address has been set
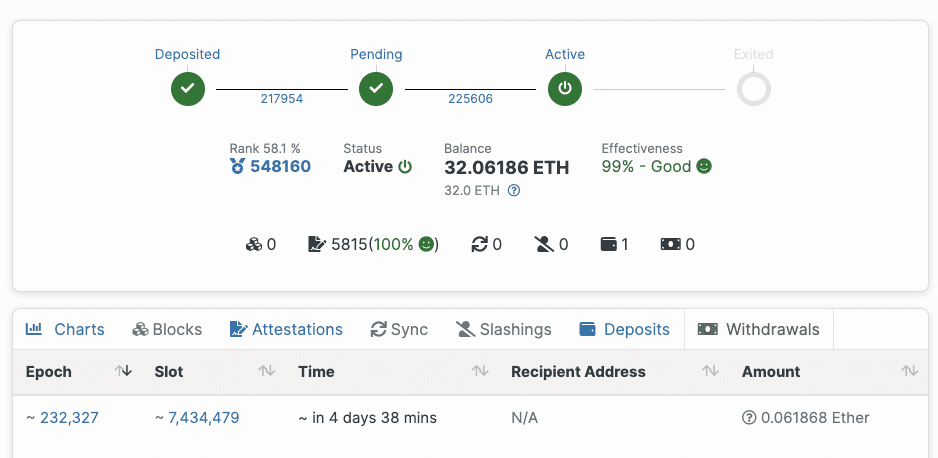
When you click on the withdrawals, you’ll see when the first withdrawal should hit.
You’ve now successfully configured your wallet address to withdraw rewards from Ethereum staking!
Now, one important thing to remember is you now have your seed phrase stored on your hard drive. This is bad. You’ll want to remove this file. Navigate to your terminal directory and perform a rm set_withdrawal_address.sh.
In our experience, withdrawals hit every 6 days and 15 hours. What’s weird though is withdrawals don’t appear as Activity on Etherscan or MetaMask. You’ll have to go to https://beaconcha.in/ , and do the math yourself.
What do you do with the withdrawals? Well, there’s always Lido.