Text BLOCKCHAIN to (415) 890-6431
Receive exclusive insights from experts about Polygon and other cryptocurrencies. Don’t worry, we won’t overload your inbox with messages.
1. Buy MATIC
To farm MATIC on Sushiswap, first, you need to acquire some MATIC. MATIC has been renamed Polygon, but the token is still referred to as MATIC so we’ll use that term throughout.
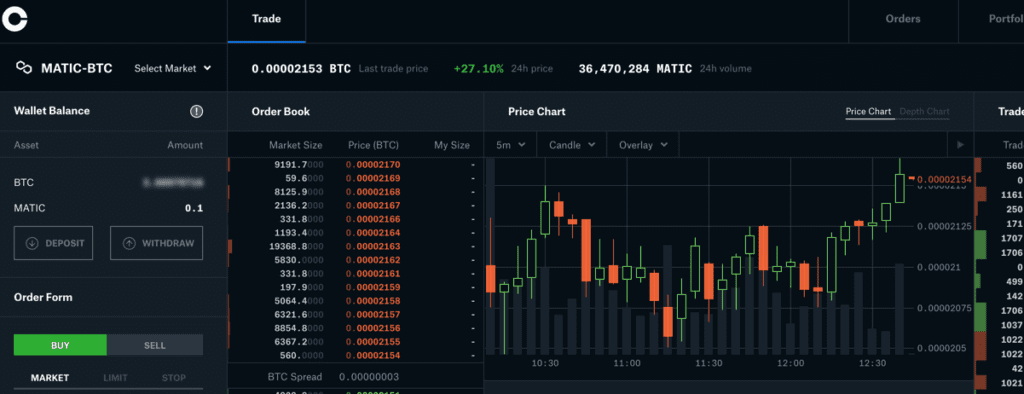
The easiest way to purchase MATIC is to go to Coinbase or Binance. At these centralized exchanges, you will be able to trade BTC or ETH for MATIC. In the screen shot below on Coinbase, you’ll see that you can purchase MATIC using BTC.
2. Withdraw Matic to MetaMask
After your purchase of MATIC has been confirmed, then you’ll be able to withdraw your MATIC from the centralized exchange to your MetaMask Wallet. You’ll grab your MetaMask wallet address, by clicking on the Account\Address portion demonstrated in the screenshot below..

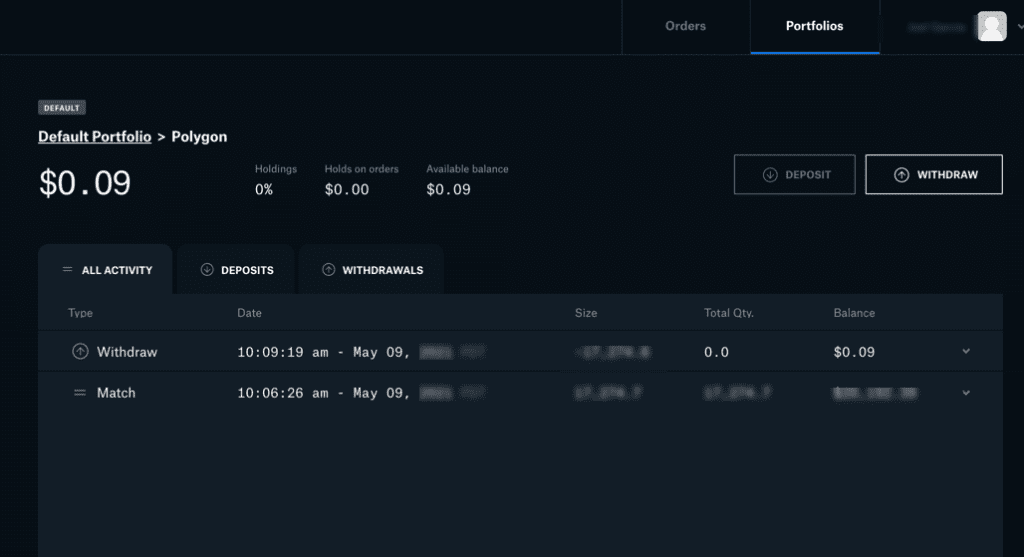
Next, you’ll navigate back into your centralized exchange, and withdraw your Matic to that address that has been copied to your clipboard. After you withdraw from the centralized exchange, it will take a couple of minutes for the Ethereum blockchain to process your transaction.
While you’re waiting, you will want to add the MATIC token to your MetaMask wallet. You can do this by navigating to the bottom of the Assets tab on MetaMask and clicking on the Add Token button.

In the subsequent Add Token dialog, you’ll need to paste in the Ethereum smart contract address for the MATIC asset. The address is:
0x7d1afa7b718fb893db30a3abc0cfc608aacfebb0
When the Ethereum blockchain finishes processing the withdrawal, you’ll be able to see the MATIC in your MetaMask on the Ethereum Blockchain.

3. Migrate MATIC to the L2 Polygon Chain
Now, you own MATIC on the Ethereum blockchain, but the Ethereum gas prices are ridiculous at the moment. You will want to migrate your MATIC asset to the L2 Polygon chain so you can farm.
To do this, head on over to the Matic wallet, https://wallet.matic.com. Login with your MetaMask account. After you login, you’ll be able to see your MATIC asset.

Click on the “Move funds to Matic Mainnet” button in the above screenshot. In the subsequent Transfer dialog, you’ll be prompted to enter the amount of Matic that you want to move to the Matic Mainnet. Specify the amount of MATIC.

Hit the Transfer button. Matic will launch a 3 step wizard that requires you to pay Ethereum gas fees to move to the Matic Network.

In the process of transferring your MATIC to the Matic Mainnet, you will walk through the steps of the wizard. Next, you’ll wait 7-8 minutes for the migration to take place.
While you are waiting. go back into MetaMask to configure the Custom RPC for the Matic network. The Matic Mainnet is a completely different network than Ethereum Mainnet. You’ll need to go into MetaMask to configure the Custom RPC
In the Settings tab of MetaMask, you’ll need to configure the following:
Network Name: Matic Mainnet
New RPC URL: https://rpc-mainnet.maticvigil.com/
Chain ID: 137
Currency Symbol: MATIC
Block Explorer URL: https://explorer.matic.network
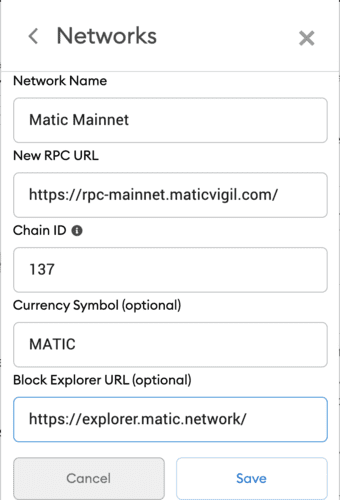
Click the Save button at the bottom of the dialog. You’ll now see that where Ethereum network would state ETHER, the Matic Mainnet will say MATIC. The MATIC token drives the network.

Now that we have the MATIC token on the MATIC Mainnet, we can proceed to yield farming on Sushi.

