Getting started
Open up the terminal on your Mac, and create a new project folder. We’ll call it allcode-polygon-nfts.
mkdir allcode-polygon-nftRun the following command from the allcode-polygon-nft directory
npm install --save-dev hardhat && npx hardhatThe && signal in Linux is used to aggregate commands. The first command will install Node Package Manager. The second command will install hardhat. Hardhat, similar to Truffle.js, is a development environment to compile, deploy, test, and debug your Ethereum software.
In your terminal shell, you should see the following output. You’ll want to select the basic sample project.
888 888 888 888 888
888 888 888 888 888
888 888 888 888 888
8888888888 8888b. 888d888 .d88888 88888b. 8888b. 888888
888 888 "88b 888P" d88" 888 888 "88b "88b 888
888 888 .d888888 888 888 888 888 888 .d888888 888
888 888 888 888 888 Y88b 888 888 888 888 888 Y88b.
888 888 "Y888888 888 "Y88888 888 888 "Y888888 "Y888
👷 Welcome to Hardhat v2.7.0 👷
? What do you want to do? …
❯ Create a basic sample project
Create an advanced sample project
Create an advanced sample project that uses TypeScript
Create an empty hardhat.config.js
QuitAfter selecting the basic sample project, hit the defaults for all of the subsequent prompts: project root, gitignore, and installing the dependenies with npm.
Open the project in your favorite IDE. I prefer IntelliJ with the Solidity plugin. You should have a directory structure that looks like
MacBook-Pro:allcode-polygon-nft joelgarcia$ ls -ltr
total 1720
drwxr-xr-x    3 joelgarcia  staff      96 Dec  3 18:01 test
drwxr-xr-x    3 joelgarcia  staff      96 Dec  3 18:01 scripts
-rw-r--r--    1 joelgarcia  staff     572 Dec  3 18:01 hardhat.config.js
drwxr-xr-x    3 joelgarcia  staff      96 Dec  3 18:01 contracts
-rw-r--r--    1 joelgarcia  staff     467 Dec  3 18:01 README.md
drwxr-xr-x  385 joelgarcia  staff   12320 Dec  3 18:01 node_modules
-rw-r--r--    1 joelgarcia  staff  860814 Dec  3 18:02 package-lock.json
-rw-r--r--    1 joelgarcia  staff     220 Dec  3 18:02 package.json
-rw-r--r--    1 joelgarcia  staff     335 Dec  3 18:05 allcode-polygon-nft.iml
The test folder is for our test scripts. The scripts folder is for our deployment scripts. The hardhat.config.js is where we’ll configure the version of solidity, network, and the contracts. The contracts folder has the solidity contract entitled Greeter.sol since we created the basic sample project. The node_modules will contain the node modules that we installed, e.g. Hardhat.
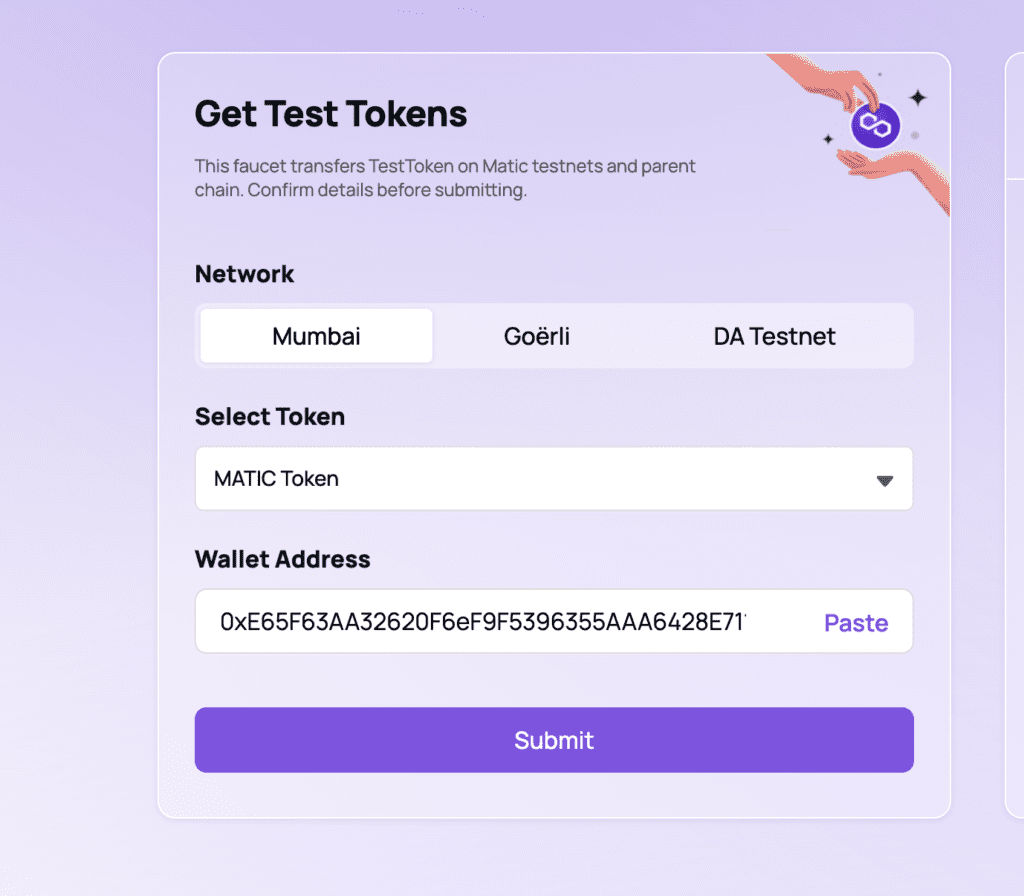
Next, we need to get out Hardhat configuration to point to the Polygon Mumbai test network. Navigate over to MetaMask app on your Firefox or Chrome. Add a new Network for the Mumbai Test net. Use the configuration here. After you get the Mumbai Test network added. Copy your wallet address in MetaMask, and paste it into the Mumbai Faucet to acquire your test network Matic.


Next, we’re going to return back to our IntelliJ IDE to get the Hardhat sample project to point to Matic. In the root directory of our allcode-polygon-nft, we’re going to create a file entitled .env. Into the .env file, put the following
PRIVATE_KEY=YOUR_EXPORTED_PRIVATE_KEYNow, we’re going to head back into MetaMask to export our private key from MetaMask, so we can place the private key into the env file. In MetaMask, clicks on the three dots on the same line as your account information. Select Account Details. Export the Private Key. Paste the private key to replace the YOUR_EXPORTED_PRIVATE_KEY.
Next, we’ll want to ensure that the .env file is not checked into your source control. Open your .gitignore file in the root directory in IntelliJ. If the .env isn’t in the file, then add it.
Going back to the terminal app, from the root directory of your project, type
npm i dotenvThis will enable our hardhat scripts to work directly with environment variables.
Going back to IntelliJ, let’s update the hardhat.config.js to let it know that it’s using Polygon. At the top of the file, let’s add the following couple of lines:
require('dotenv').config();
const PRIVATE_KEY = process.env.PRIVATE_KEY;
This will tell our code to make use of the dotenv configuration. We’ll import the private key from the .env file.
Next, we’ll need to find the module.exports object in the hardhat.config.js file. We’ll want to replace the contents with the following:

In the module.exports, we’re telling hardhat that we’re making use of the matic test-network, specifying the latest version of solidity, and providing the location of the appropriate directories.
Okay, we’ve done a lot. We’ve provided our exported private key, introduced the environment variable, and specified the paths for the our contracts test scripts, and artifacts. Let’s make sure we didn’t screw up by deploying the Greeter.sol to the Mumbai test network.
npx hardhat run scripts/sample-script.js --network maticThis command will tell hardhat to run the sample-script.js, which will deploy the Greeter.sol. The network parameter will specify the matic network that is on module.exports in our hardhat.config.js.
Your output should look like
Downloading compiler 0.8.0
Compiling 2 files with 0.8.0
Compilation finished successfully
Greeter deployed to: 0xd3305a49CC09D2011951Af81473E7ab4eF540E37
Congratulations! You’ve just deployed your first contract to the Polygon Mumbai network. In our next tutorial, we’ll write some ERC721 Non-fungible tokens that make use of OpenZeppelin
