NBA Top Shot is one of the earliest uses of the Flow blockchain. It’s been a smashing success in part because DapperLabs and Flow are trying to bring crypto to the masses.
In this three-part tutorial, we’ll create NFTs on the Flow Emulator, and store the IPFS hash to the asset as metadata in the NFT contract.
The steps to this tutorial are:
- Creating the Contract - This blog entry
- Uploading the asset to IPFS with Pinata
- Deploying the contract to the Flow Emulator and verifying that the NFT has been minted correctly with the correct content.
Setting Up
We need to install the Flow CLI first. Flow’s documentation has some good installation instructions.
Open your terminal app and type the following command:
brew install flow-cli
We’ll also need to have Node.js installed and an IDE, which supports Flow’s programming language, Cadence. You can install Node here. We’ll leverage WebStorm for the IDE.
I’m on Mac, so let’s open the terminal app and create a directory to house our project.
mkdir allcode-nft
To begin a new flow project, navigate to that directory and initialize flow:
cd allcode-nft
flow init
The terminal prompt will echo back
Configuration initialized
Service account: 0xf8d6e0586b0a20c7
Start emulator by running: ‘flow emulator’
Reset configuration using: ‘flow init –reset’
Now, open the project in WebStorm
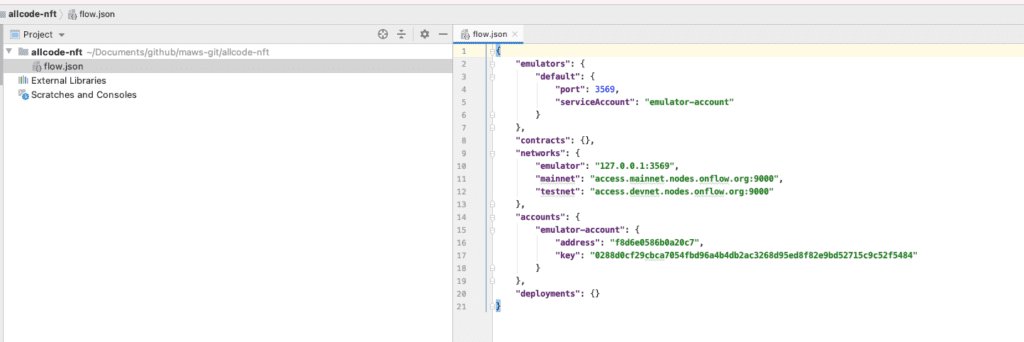
You’ll see a flow.json file that we will be making use of soon.

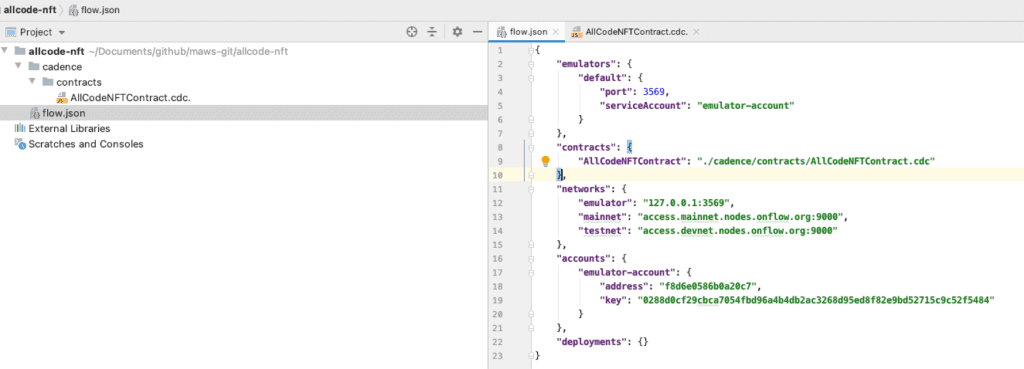
On the allcode-nft folder, create a new sub-folder called cadence. Within that folder, add another folder called contracts. And finally, create a file within the contracts folder called AllCodeNFTContract.cdc.
Before we move forward, it’s important to point out that everything we do in regards to the Flow blockchain from this point forward will be done on the emulator. Deploying a project elsewhere, to testnet or mainnet, is as simple as updating configuration settings in your flow.json file. Let’s set that file up for the emulator environment now and then we can start writing our contract.
Update the contracts object in flow.json to look like this:
“contracts”: {
“AllCodeNFTContract”: “./cadence/contracts/AllCodeNFTContract.cdc”
}
Then, update the deployments object in that file to look like this:
“deployments”: {
“emulator”: {
“emulator-account”: [“AllCodeNFTContract”]
}
}
This is telling the Flow CLI to use the emulator to deploy our contract. It’s also referencing the account (on the emulator) and the contract we will write soon. Let’s start writing that bad boy now.

The Contract
Flow has a great tutorial on creating NFT contracts. It’s a good reference point, but as Flow points out themselves, they have not yet solved the NFT metadata problem. Flow would like to store metadata on chain. That’s a great idea. However, the blockchain is still not a good place to store image and video files. Instead, we want to store the image and video files on IPFS, and have the assets on the blockchain point to these files.
If you’re familiar with NFTs on the Ethereum blockchain, you may know that many of the assets those tokens back are stored on traditional data stores and cloud hosting providers. This is what it is… 🙂
IPFS helps with the storing of the image and video files. Pinata provides an easy way to pin that content long-term on IPFS. This is exactly what we want for the media that backs our NFTs. We want to make sure that we can prove ownership (the NFT), provide data about the NFT (the NFT), and ensure that we have control over the underlying asset (IPFS) —media or otherwise—and not some replica.
With all this in mind, let’s write a contract that mints NFTs, associates metadata to the NFT, and ensures that metadata points to the underlying asset stored on IPFS.
Open up the AllCodeNFTContract.cdc and let’s get to work.
pub contract AllCodeNFTContract {
    pub resource NFT {
        pub let id: UInt64
        init(initID: UInt64) {
            self.id = initID
        }
    }
}
The first step is defining our contract. We start by defining AllCodeNFTContract. Within the contract, we define a public resource. What’s a resource, you might ask?
Flow behaves completely differently from Ethereum. In Flow, resources are items stored in user accounts and accessible through access control measures. In this case, the resource is the NFT. The id property allows us to uniquely identify our NFT tokens.
Next, we need to create a resource interface that we will use to define what capabilities are made available to others (i.e. people who are not the contract owner). Again, this whole paradigm is completely different from Ethereum. Flow enables us to specify what functions of a resource a user can access.
pub resource interface NFTReceiver {
  pub fun deposit(token: @NFT, metadata: {String : String})
  pub fun getIDs(): [UInt64]
  pub fun idExists(id: UInt64): Bool
  pub fun getMetadata(id: UInt64) : {String : String}
}
Put this code right below the NFT resource code. This NFTReceiver resource interface says that whomever we define as having access to the resource will be able to call the following methods:
depositgetIDsidExistsgetMetadata
Next, we need to define our token collection interface. Think of this as the wallet that houses all of a user’s NFT.
pub resource Collection: NFTReceiver {
    pub var ownedNFTs: @{UInt64: NFT}
    pub var metadataObjs: {UInt64: { String : String }}

    init () {
        self.ownedNFTs <- {}
        self.metadataObjs = {}
    }

    pub fun withdraw(withdrawID: UInt64): @NFT {
        let token <- self.ownedNFTs.remove(key: withdrawID)!

        return <-token
    }

    pub fun deposit(token: @NFT, metadata: {String : String}) {
        self.metadataObjs[token.id] = metadata
        self.ownedNFTs[token.id] <-! token
    }

    pub fun idExists(id: UInt64): Bool {
        return self.ownedNFTs[id] != nil
    }

    pub fun getIDs(): [UInt64] {
        return self.ownedNFTs.keys
    }

    pub fun updateMetadata(id: UInt64, metadata: {String: String}) {
        self.metadataObjs[id] = metadata
    }

    pub fun getMetadata(id: UInt64): {String : String} {
        return self.metadataObjs[id]!
    }

    destroy() {
        destroy self.ownedNFTs
    }
  }
There’s a lot going on in this resource, but it should make sense soon. First, we have a variable called ownedNFTs. The ownedNFTs variable keeps track of all the NFTs a user owns from this contract.
Next, we have a variable called metadataObjs. This one is a little unique because we are extending the Flow NFT contract functionality to store a mapping of metadata for each NFT. This variable maps a token id to its associated metadata, which means we need the token id before we can set it.
We then initialize our variables. This is required for variables defined in a resource within Flow.
Finally, we have all of the available functions for our NFT collection resource. Note that not all of these functions are available to the world. If you remember, we defined the functions that would be accessible to anyone earlier in our NFTReceiver resource interface.
I do want to point out the deposit function. Just as we extended the default Flow NFT contract to include the metadataObjs mapping, we are extending the default deposit function to take an additional parameter of metadata. Why are we doing this here? We need to make sure that only the minter of the token can add that metadata to the token. To keep this private, we keep the initial addition of the metadata confined to the minting execution.
We’re almost done with our contract code. So, right below the Collection resource, add this:
pub fun createEmptyCollection(): @Collection {
    return <- create Collection()
}

pub resource NFTMinter {
    pub var idCount: UInt64

    init() {
        self.idCount = 1
    }

    pub fun mintNFT(): @NFT {
        var newNFT <- create NFT(initID: self.idCount)

        self.idCount = self.idCount + 1 as UInt64

        return <-newNFT
    }
}
First, we have a function that creates an empty NFT collection when called. This is how a user who is first interacting with our contract will have a storage location created that maps to the Collection resource we defined. After that, we create one more resource. This is an important one, because without it, we can’t mint tokens. The NFTMinter resource includes an idCount which is incremented to ensure we never have duplicate ids for our NFTs. It also has a function that actually creates our NFT. Right below the NFTMinter resource, add the main contract initializer:
init() {
      self.account.save(<-self.createEmptyCollection(), to: /storage/NFTCollection)
      self.account.link<&{NFTReceiver}>(/public/NFTReceiver, target: /storage/NFTCollection)
      self.account.save(<-create NFTMinter(), to: /storage/NFTMinter)
}
This initializer function is only called when the contract is deployed. It does three things:
Creates an empty Collection for the deployer of the collection so that the owner of the contract can mint and own NFTs from that contract.
The Collection resource is published in a public location with reference to the NFTReceiver interface we created at the beginning. This is how we tell the contract that the functions defined on the NFTReceiver can be called by anyone.
The NFTMinter resource is saved in account storage for the creator of the contract. This means only the creator of the contract can mint tokens.
The full contract can be found here.
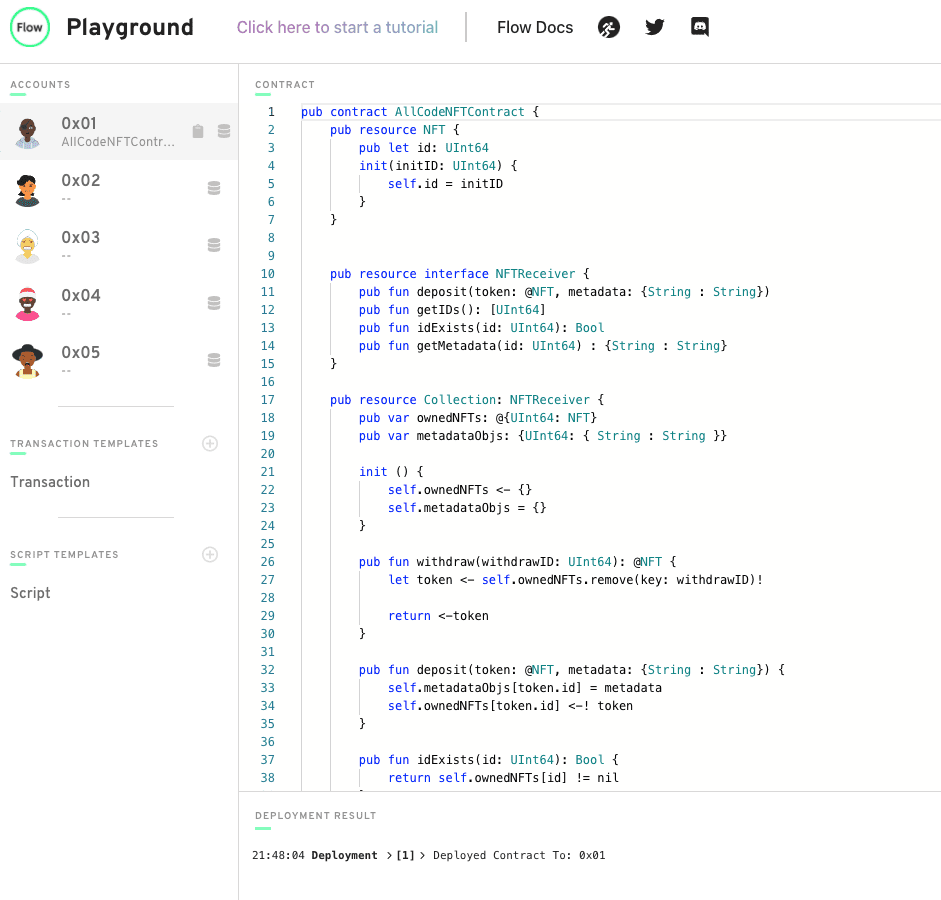
Now that we have a contract ready to go, let’s deploy it, right? Well, we should probably test it on the Flow Playground first. Go there and click on the first account in the left sidebar. Replace all the code in the example contract with our contract code, then click Deploy. If all goes well, you should see a log like this in the log window at the bottom of the screen:
16:48:55 Deployment Deployed Contract To: 0x01

Now we’re ready to deploy our contract to the locally running emulator. From the command line, run this:
flow emulator
Now, with our emulator running and our flow.json file configured properly, we can open another terminal shell to deploy our contract. Simply run this command:
flow project deploy
If all went well, you should see an output like this:
Deploying 1 contracts for accounts: emulator-account
AllCodeNFTContract -> 0xf8d6e0586b0a20c7 (4a8540e3c89c2b069a4fe10ff36fef17a453904815239ea3c8a218e74b904712)
✨ All contracts deployed successfully
We now have a contract live on the Flow emulator, but we want to mint a token. Let’s close out this blog post by taking care of that.
In our next tutorial, we’ll look into uploading an image to Pinata that we can make reference to in our NFT


